For members of WING: while you are conducting research in various fields, it is expected that you can keep your own project page up-to-date; for new comers of the group, you may find the below content useful to help you get started on your project page.
- Sign up for WordPress if you haven’t done so, and upload a profile picture of you to your own account.
- Proceed to wing.comp.nus.edu.sg; you’ll see a WordPress site. Log in to the site using the group account (wing.nus as the username. If you forget the group password, email your respective Ph.D. mentor separately).
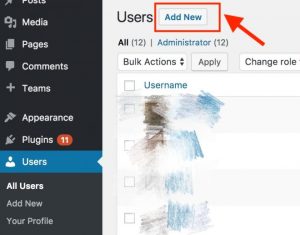
- Click into the Dashboard, and on the left panel you’ll see links like ‘Users‘ and ‘Pages‘. Click into the ‘Users‘ page, and select ‘Add New‘; add your own WordPress account as a new user of the site (currently you are wing.nus). You may assign yourself as an Administrator of the site.
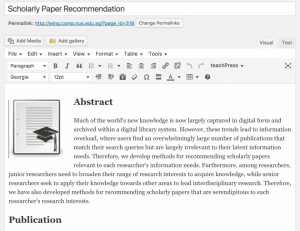
Add yourself as a new member of the group. - Now log-out and re-log into the page using your own account. Go into the ‘Pages‘ site. You’ll see a list of project pages. What you need to do is to come up with a page describing your own project. You may pick any existing one as the sample, or make a copy of the ‘Project Template‘ page and directly modify it. The requirements can be found inside that page. When you are done, don’t forget to publish such that it can be stored in our database.
You may use any project page as a start. - As we are updating the ‘People‘ listing, we may need a relatively clear profile photo of each one of you (the current design provides quite some space for showing, so pick a pretty one 🙂 ). Now go back to the WordPress site and click into the ‘Media‘ tab on the left panel; select ‘Add New‘ to upload a profile photo of you. Name the photo using your real name so that later it’s easier for us to recognise. And now on the left panel, click into the ‘+Teams‘ tab, select the right group (are you a staff, graduate or undergraduate student?), and then click ‘Add New‘ to enter your own information, including your name, position, research topics, any personal websites or links, and the profile photo you just uploaded. You may follow the pattern of existing members for this.
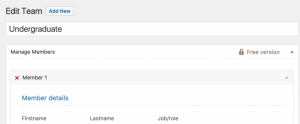
Add yourself as a new member in the corresponding group with photos. - Take note that we encourage you to store a copy of any of your research files inside the WP site, including the PDF of your paper, any presentation slides for group meetings, etc. Hence in the left panel, look for ‘WP File Manager‘ tab, and in the prompting window, go to directory wp-content/uploads/Publications, put your files in the corresponding folder. After uploading, you may click the file to view the URL associated with it.
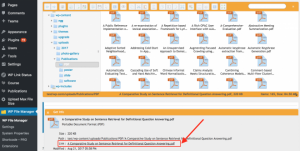
The File Manager with the info of the papers. - Now if you uploaded a presentation slide, go back to your own project page, and in the section ‘Meetings‘, add the timing of the meeting when you present your work to the group, and apply a hyperlink to it, pointing to the URL you just obtained from Step 6; if you uploaded your paper, refer to the Group Google Doc: Our Public Persona / Archivist (Joomla) to complete the ‘Publications‘ section.